A Raspberry Pi smart doorbell can give you real-time two-way audiovisual access to whoever is at your doorstep, regardless of where you are. You may install the smart doorbell at your house, apartment, or office. Also, you can use the Raspberry Pi smart doorbell as an audiovisual intercom system.
Here’s a DIY guide on how you can make a Raspberry Pi smart doorbell:
- Get your tools and components ready
- Create the smart doorbell housing/enclosure
- Install the Raspberry Pi computer
- Install the mini camera
- Install the pushbutton
- Install the internal speaker
- Connect the wires to Raspberry Pi
- Install the LCD/LED screen
- Insert the micro USB connector
- Seal the enclosure
The real challenge is getting the customized components, such as the proper housing or enclosure for your Raspberry Pi smart doorbell. This step-by-step DIY guide tries to simplify the whole process. Each segment includes the specifications of the different things you need.
1. Get Your Tools and Components Ready
A DIY Raspberry Pi smart doorbell comprises the following:
- Housing or Enclosure
- Raspberry Pi (3 or later)
- USB Microphone
- Mini Camera
- Pushbutton
- Internal Speaker
- LCD/LED Screen
- Micro USB Connector
- Machine and Mounting Screws
- OS, Code, and Customization
You’ll also need some tools to build the doorbell: a hex key, wire stripper and cutter, soldering iron, solder wire, and electrical tape, as well as a drill and mounting screws for installation. Also, access to power and the internet are central to operating a Raspberry Pi smart doorbell.
You may check out the company website for readymade products you need online. You can also purchase the latest Raspberry Pi 4 from Amazon.com.
2. Create the Smart Doorbell Housing/Enclosure
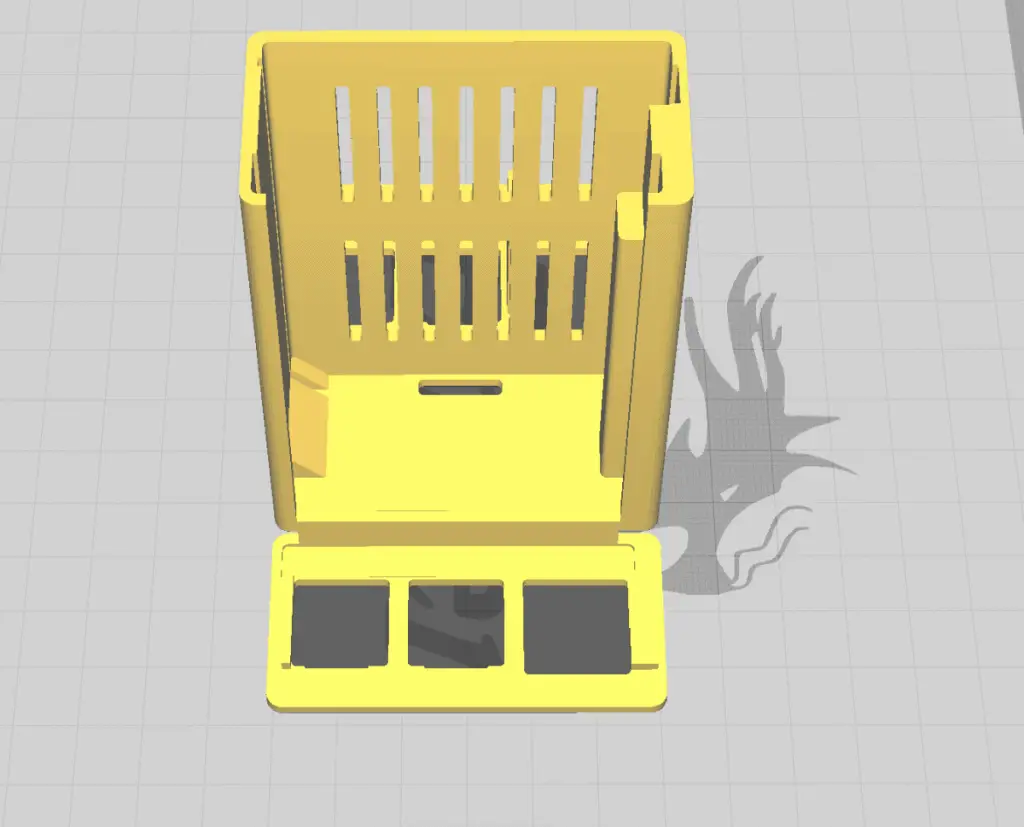
The housing or enclosure can be a rectangular box made of metal or plastic. You can design it yourself and then 3D-print it if you have access to a 3D printer. If your looking to get into 3D printing, this article is worth a read “Is 3D Printing Worth It? – Details Inside!“.
The alternative is to consult a 3D printing expert who can also design the enclosure to suit your Raspberry Pi smart doorbell.
The enclosure should have four holes on the corners on the backside so that you can mount it on the wall. Inside, the chamber needs one base for the computer and another for the camera.
A Raspberry Pi is typically installed using 2.5 mm (0.098 inches) machine screws. The enclosure should have four raised sections as the base for the Raspberry Pi, so you can use a hex wrench and firmly set the single-board computer.
Small doorbell cameras are usually compatible with 2 mm (0.078 inches) screws. The raised base for the camera inside the enclosure should be suitable for these tiny screws.
Some mini webcams and security cameras can be installed using larger screws. The camera should be just above the computer, so design your enclosure accordingly.
The enclosure’s front panel needs a rectangular opening for the LCD/LED display, an opening at the top for the camera, and one hole below the screen for the pushbutton. The bottom panel of the enclosure facing down must have a tiny hole or a few pores to facilitate audio communication through the microphone and the speaker.
There should be a few other essential outlets depending on your needs. You need at least one hole for the power cable. You may use a power bank through a micro USB cable or connect the device to a socket, or a recessed or concealed wiring.
This case on Thingiverse is a good starting point.
3. Install the Raspberry Pi Computer
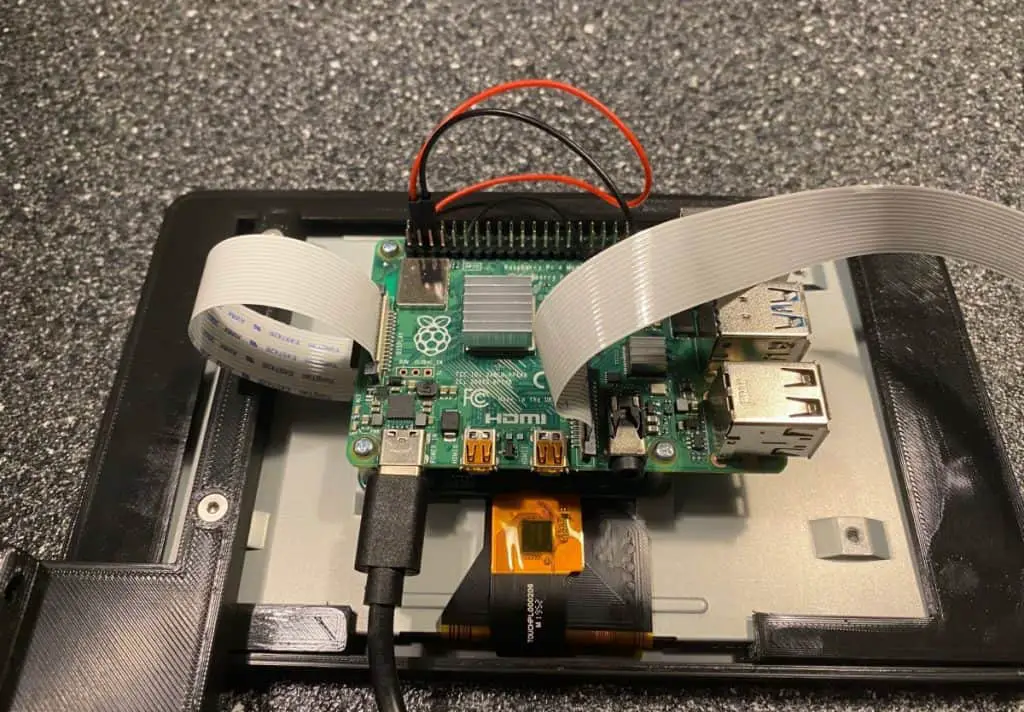
Before you set the Raspberry Pi into the enclosure, you must connect the USB microphone. Since this goes into the base of the Raspberry Pi, you won’t be able to access it after you house it inside the enclosure.
You need the Raspberry Pi with a connected USB microphone, 4 x 2.5 mm (0.098 inches) machine screws, and a hex wrench. Set the Raspberry Pi (3 or later) inside the housing and use your hex wrench to insert the machine screws one by one.
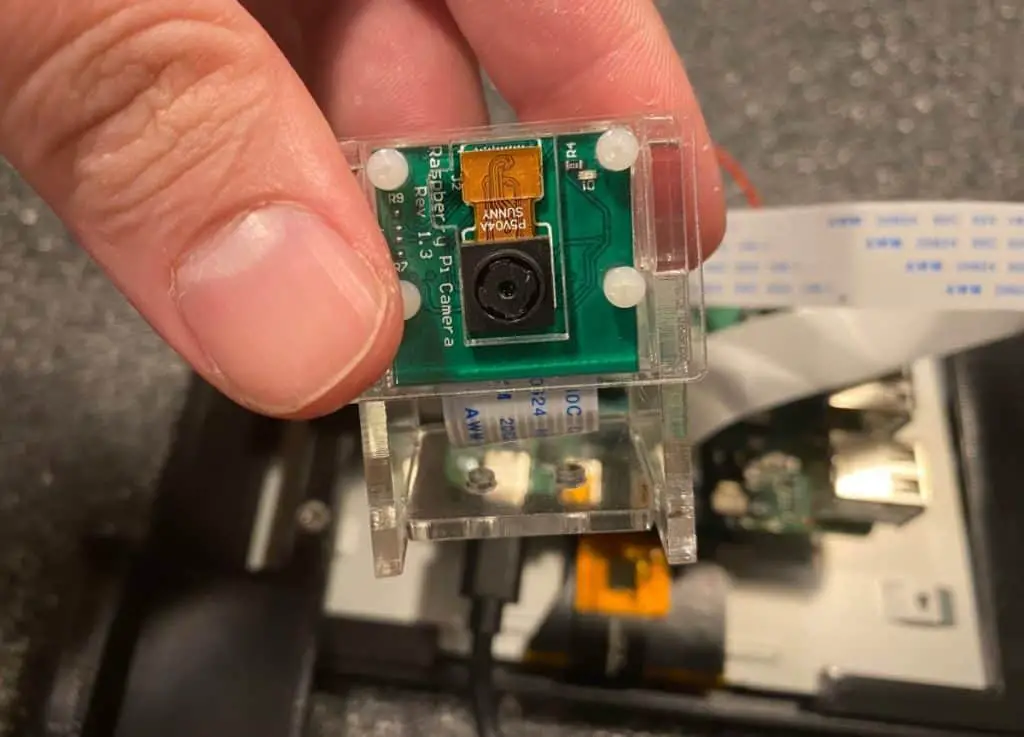
4. Install the Mini Camera
You can use any compatible mini camera. The Raspberry Pi Camera Module V2 from Amazon.com is a suitable option. You’ll need the camera, hex wrench, and 2 x 2 mm (0.078 inches) machine screws. Some cameras may also need more than two screws or different sizes.
If you use Raspberry Pi 2, 3, or 4, you’ll find the camera port between the audio port and the micro HDMI ports. Take the ribbon cable and plug the camera in. Be careful not to bend or twist the cable too much.
5. Install the Pushbutton
There are different approaches to installing a pushbutton into a Raspberry Pi smart doorbell. The specific steps depend on the pushbutton you choose and how you must wire it.
If you choose a bare or unwired pushbutton, you’ll have to use four jumper wires and solder one set of ends into the switch. Then, you need to connect the other group to the computer.
Here’s a video showing how you can solder wires onto a switch:
A convenient alternative is to use a wired pushbutton. I recommend Twidec 16mm Push Button from Amazon.com, which comes with four connected wires. It supports 500,000 cycles and has a two-year warranty.
With a wired pushbutton, you don’t have to go through the trouble of soldering wires into the push button. Insert the pushbutton into the front hole in the enclosure, ensure a snug fit, and take the wires inside the enclosure.
6. Install the Internal Speaker
The installation method depends on the mini speaker you choose. If you choose a model that needs 2.5 mm (0.098 inches) screws, the enclosure must accommodate them.
I recommend the Adafruit Mini Metal Speaker from Amazon.com. It’s relatively small (just under 1.1 inches or 2.79 cm in diameter) and only uses 0.5 W of power.
If you’re looking for a smaller option, you may use the FarBoat Internal Magnetic Speaker from Amazon.com. This speaker also draws half the power. You can set this up somewhere convenient inside the housing if your Raspberry Pi smart doorbell enclosure is metal.
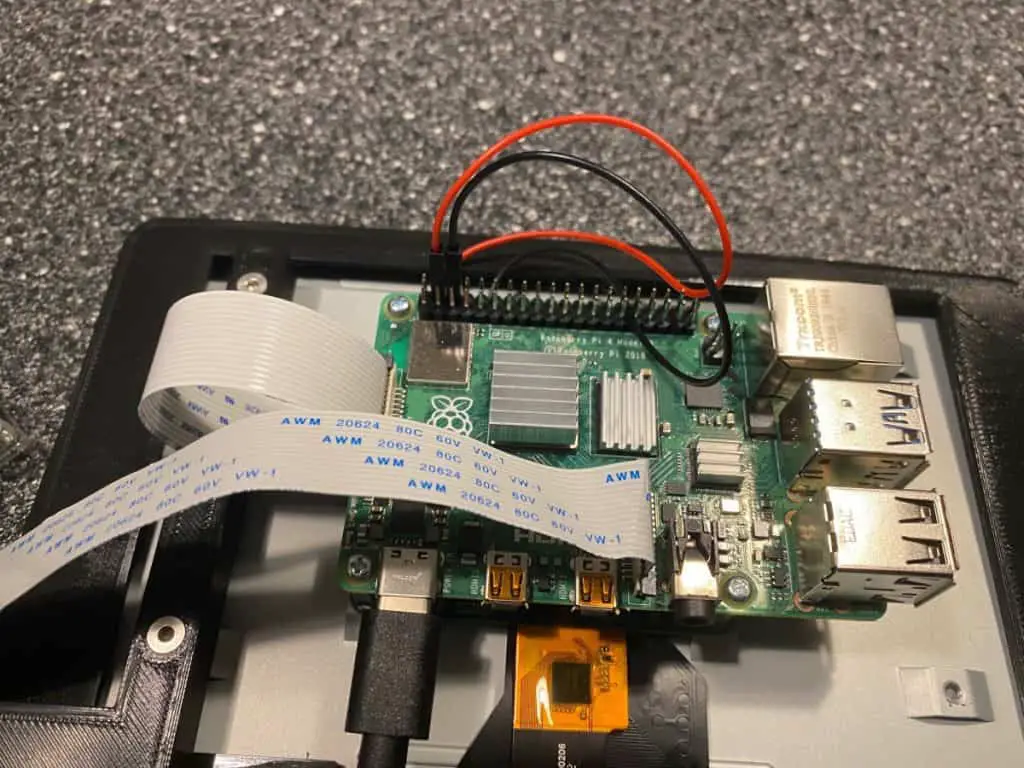
7. Connect the Wires to Raspberry Pi
Raspberry Pi (3 or 4) has 40 GPIO pins. You don’t have to fuse multiple similar wires to connect them to one appropriate pin. For example, you can use dedicated ground pins for the respective wires of the different components.
However, you may run out of pins depending on the components you are using. If that happens, you can combine similar wires using electrical tape and connect them to one appropriate GPIO pin on the Raspberry Pi.
You may have to solder two similar wires and connect them to extend their length. Here’s a helpful video you can watch:
You may encounter some problems after soldering the wires and connecting the pushbutton to a circuit. So here’s an explainer video to avoid the common issues of wiring a pushbutton switch:
Refer to the circuit diagrams for the pushbutton and speaker to avoid mistakes while connecting the wires. The user manuals explain the positive and ground wires, among other essential information.
The Raspberry Pi manual has all relevant information about the GPIO pins. You can also use this GPIO diagram and the accompanying guide for easy reference.
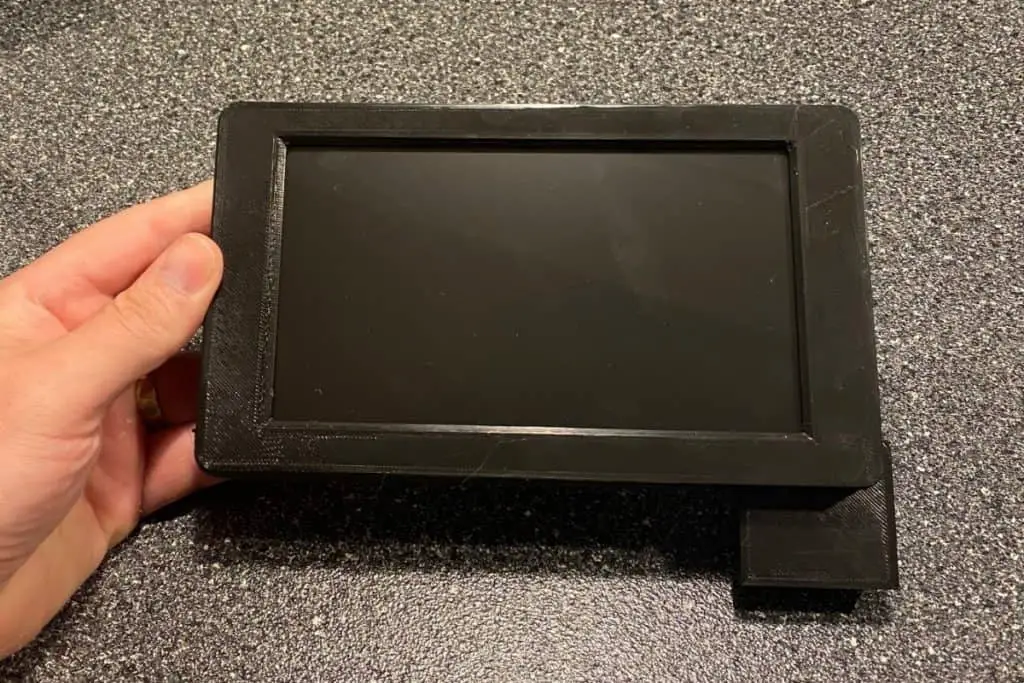
8. Install the LCD/LED Screen
Install the LCD/LED last since it’ll effectively cover the Raspberry Pi and cut off access. Align the screen per the pins and set it firmly onto the board. Connect the HDMI into the dedicated port on the Raspberry Pi.
The latest Raspberry Pi models have micro HDMI ports. Hence, you’ll have to choose a 3.5 inch (9.5 cm) LCD/LED display compatible with micro HDMI. It is not necessary to buy a touchscreen panel or a larger screen.
9. Insert the Micro USB Connector
Raspberry 3 Model B has a 5V micro USB power port. Get an appropriate connector or power cable and insert it into the dedicated port. The subsequent route it takes depends on the design of your enclosure and the type of power source.
You may plug the cable into a power bank or use an adapter to connect it to a socket. Also, you may choose another wiring method to power the smart doorbell depending on the available provisions at the installation site.
10. Seal the Enclosure
Use appropriate screws depending on the design of the housing and seal the enclosure. Don’t mount the Raspberry Pi smart doorbell on the wall just yet. You must install a code, sync the device, test all the components, and then mount it.
Installing the Right Operating System
Raspberry Pi has many capabilities, letting you add extra functionality to your smart doorbell, such as face detection. To get things going, you need to install the right operating system. Here are a few options:
Raspbian OS
You may choose to use the Raspbian OS to set up your Raspberry Pi smart doorbell. You’ll need the Raspbian OS to be installed on your Raspberry Pi before you can get started. Use this comprehensive guide for the configuration.
OpenHAB
Another option is to use openHAB. Open Home Automation Bus is effortlessly compatible with Raspberry Pi. You can automate more than just a smart doorbell in your house using this platform.
You may design an architecture, decide the rules, and customize the scripts. Alternatively, a standard openHAB integration can come in handy. Try to use this primer to get started.
Google Duo
You can use the Google Duo web app to set up your Raspberry Pi smart doorbell. Try to start with a brand new or used Raspberry Pi, install or reinstall the Raspbian operating system, and use the Google Duo platform to get started.
One advantage of this approach is the simplicity of the code. The script runs automatically once the setup is complete. You can get the code here.
Challenges of Making a Raspberry Pi Smart Doorbell
You may encounter several hiccups during your DIY project. The specific difficulties depend on your components and the functionality you’re trying to achieve.
There might be issues you can encounter with the 3D-printed enclosure. Some components, such as the display or the pushbutton, may pose problems depending on their specifications and features.
You may have to use the LCD/LED screen as a power source for the speaker if you don’t have any appropriate GPIO pin to spare. In such a scenario, you must solder the speaker’s wires into the back of the LCD/LED screen, where you’ll find two tiny pads to facilitate this.
The speaker itself may or may not have a JST connector. You might have to buy one separately. These DIY challenges will have to be met with impromptu hacks using whatever resources you have available.
You may also experience some issues while working with a code or running a script. There can be surprises, such as your Raspberry Pi smart doorbell restoring to its default settings after a reboot.
These problems are specific, and the troubleshooting depends on the operating system, programming language, code, or script you use.
Raspberry Pi Smart Doorbell Security Recommendations
You can connect your Raspberry Pi smart doorbell to your Wi-Fi. The single-board computer has an Ethernet port as well. Any device installed outside that facilitates access to your private network is vulnerable to misuse.
Raspberry Pi has micro USB ports that can be accessed and misused by anyone if the enclosure of your smart doorbell is not sturdy. Where and how you install the device will determine the associated risks.
You can use a cloud-based server or a network. A virtual cloud network (VCN) is a safe option. You can also keep your Raspberry Pi smart doorbell functioning if you are not home and your Wi-Fi router is off.
Final Thoughts
A Raspberry Pi smart doorbell can be an inexpensive alternative to the many off-the-shelf products available today. You can use Raspberry Pi with different compatible hardware and software to build an array of utilities and home automation systems.