The tablet hardware design allows the consumer to use it as it is until it dies after a certain period. Most of them feature a battery you cannot change. The only things you may change are the memory card and the battery. And even changing the battery may not be that easy.
You cannot easily upgrade tablet hardware because the design may not allow for easy access. Furthermore, the technology it uses is exclusive, and so it is only the manufacturer who may know what to do to upgrade the hardware.
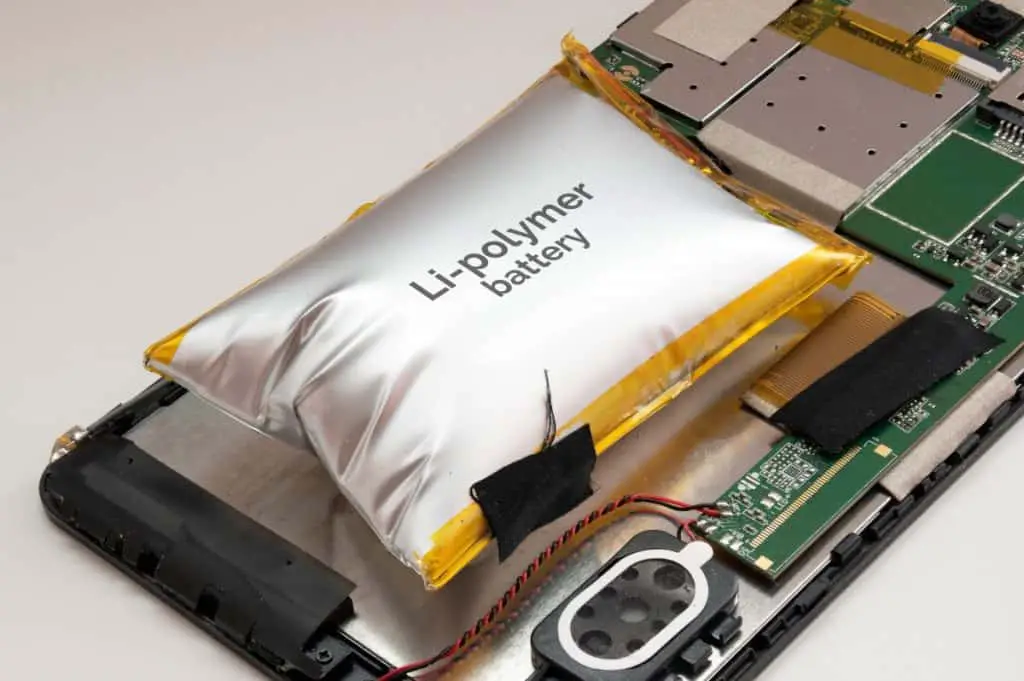
A tablet is unique in all aspects. It does not have a fan since the power it uses to run the CPU can never reach a temperature requiring a fan. The battery takes ½ or 1/3 of the width of the device. It leaves the other half or so space for the touch screen, RAM, controller, Wifi Module, and SSHDD in some models. The user can swap the batteries while this is not possible in other devices. Read on to learn the few changes you can make to help improve the performance of your tablet.
Can I Upgrade The Tablet’s Hardware?
Unfortunately, you cannot upgrade all hardware. You can upgrade just a few hardware, such as the RAM, SD card, or Wifi module and perhaps the battery. But it may not be easy to upgrade the entire motherboard. However, the new models allow you to replace the motherboard with a new one. But even doing so is difficult.
Are Tablets Upgradeable?
Some companies are now designing tablet components that you can upgrade. For instance, some brands such as HP and galaxy are incorporating components you can easily upgrade. Some of them include Bluetooth, Wifi, and GPS. In addition, the Samsung galaxy tablet allows the consumer to replace the entire motherboard.
This is in addition to the microSD and SD that you can swap to expand the storage capacity. HP has also included a thermal management assembly comprising tape, copper, beefy heatsink, and a fan. In this model, the heatsink is bolted onto the motherboard and the I/O. They form a single system that you can replace in full when the power jack and the USB ports stop functioning.
Can You Repair The Tablet Hardware?
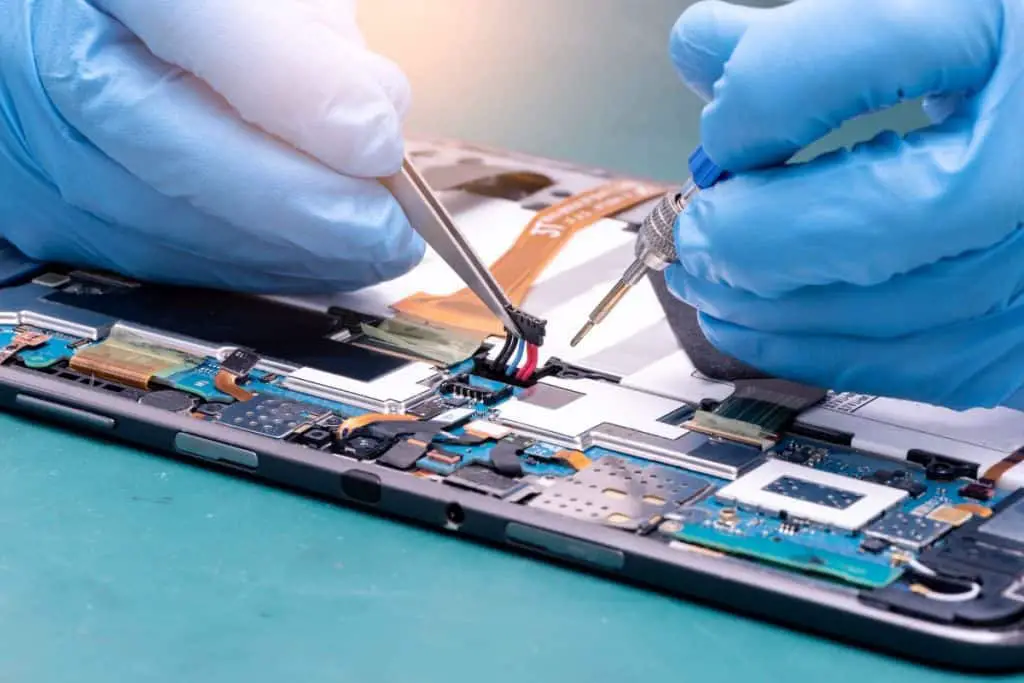
Yes, it is possible to repair the hardware if you have the know-how. The tricky part of it is to remove the motherboard. However, you should be able to do this if you have access to the repair manual. Once you access the motherboard, you should remove other speakers, cameras, sensors, and antennas. You will also come across a dose of copper tape that holds most of the parts in place
Also, it is possible to replace some components on your tablet if you have the right equipment. You will need special electronic gadgets, including hot air, rework machines, and specialized guns. Unfortunately, the equipment is pricey, and so it renders the effort to upgrade your tablet through a change of components expensive, complex, and unbeneficial.
But to access the tablet’s hardware, you need the right screwdriver, depending on the size. You can then open and access the parts that need to be repaired or replaced.
Can You Upgrade The Processor In A Tablet?
Swapping the CPU is difficult since the motherboard is not supposed to be accessed. So, in most cases, the processor will be soldered in place. It means that trying to access the processor for purposes of upgrading will automatically void the warranty. Also, it is likely to result in negligible gains in terms of performance.
So, the only way you can improve the device’s performance is through software solutions and not through processor upgrades.
Are There Things To Consider When Upgrading Your Tablet?
Well, just like any other machine, you will not be happy to spend money on upgrading your tablet and don’t get the full benefits. So, if you can overhaul your tablet hardware, think about the following:
How old is the tablet? – when you decide to upgrade your tablet, there is a 50% chance of ruining it. The earliest versions do not give the customer a chance to upgrade the hardware save for the battery and memory. For the newer versions, you may upgrade a few hardware, including replacing the motherboard. But if the device is old and you stand to lose nothing if you try to upgrade it, then go ahead.
Your level of experience if you are a tech-savvy person, you will not find any problem trying to update your tablet. However, if you are just starting, let an expert do the job for you if it is a must that you upgrade your tablet.
The final effect on productivity- sometimes an upgrade may not give the expected outcome. Instead, it may reduce the tablet’s performance. So, if there are no known benefits of upgrading specific hardware, you will be better off leaving the device in the state it is in.
The cost- sometimes, an upgrade may entail replacing hardware. Some hardware are costly, and so instead of upgrading them, you will be better off buying another tablet. For instance, if you were to upgrade your tablet by replacing the motherboard, you would need to spend an amount that is almost enough to buy a new tablet. So, you can save yourself from trouble by just buying a new tablet.
It doesn’t matter what you decide to do. Upgrading a tablet’s hardware is tedious and expensive. Besides, it may not solve the problem at hand. Also, it may not make it better. So, the best way to go about this is to talk to an expert for some advice.
How you can operate Tablet’s Storage
Since it is difficult to upgrade a tablet’s hard drive, the easier option is to upgrade the micro-SD storage.
Modern tablets feature micro-SD slots. So, it allows you to easily slide in a larger capacity SD card without opening the device or removing the cover.
The old tablet does not support 128 GB, 512GB or 256 GB SD cards. Therefore, there are three SD formats you may need to check. Think about replacing the mSATA SSD with a capacity replacement.
To start you off, you will need to install windows eight on your tablet, insert the larger SD card and use software to sync it. If the device does not have an external SD card slot, you may need to upgrade the native storage. This way you would be able to enhance its storage. Check and ensure that you buy the correct form of SSD. Some come with standard SATA connectors and those that come with compact mSATA alternatives. Whatever connectors you choose, they should be able to fit in your tablet and enhance storage.
But to do this job, you will need an assortment of tools. some of them are:
- Spudger tools
- mSATASSD
- Guitar plectrum, Boc cutter blade
- Screwdriver
- Suction cup
- Soft towel
- A flat surface
You will also need to take precautions, including installing windows on the installed SSD. So, you will need a copy of windows on a USB. Set up the DVD drive to allow you to install an OS from the recovery drive. Also, you may need to consider buying an adapter to allow you to connect your mSATA SSD externally to the tablet. You will then need to allow the windows to boost from USB or have an external DVD in place and use the recovery disc to install the operating system.
As you install your mSATA into the tablet, you will need to be slightly cautious to avoid breaking the tablet computer. Also, you must take the necessary step to ensure to reduce static shocks.
Procedure
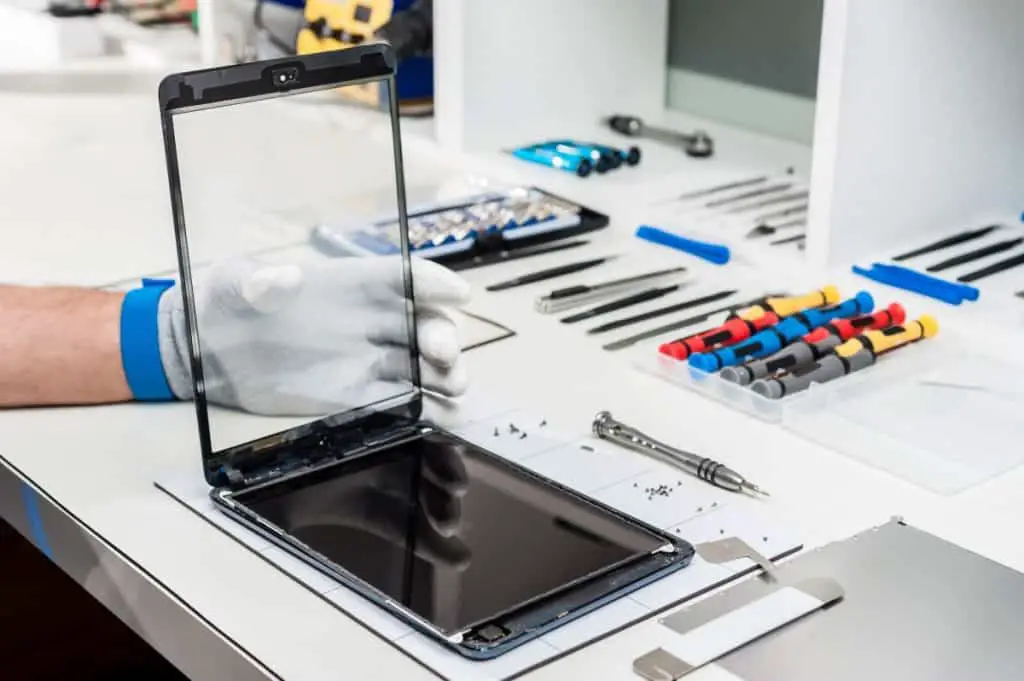
Open the tablet to get access. Open it using the manufacturer’s recommended method. if you find it difficult, get help from YouTube or Google. But before you open it, beware that opening the device will void the warranty. Also, do not apply a lot of pressure while opening it. For the Acer Iconia tablet, go to the back and remove the white strip. Ensure to place the device on the back as you remove the strip.
Once you remove the strip, remove the screws and place the components safely to allow you to replace them later.
Let the tablet stand on the longest edge and use the other hand to pull the chassis using the boxcutter blade. You may also use a small suction to remove the display. Once you access the motherboard, there are several cables that you will need to disconnect. However, take note of the cables to make your replacement work easier and don’t damage them. Once you remove the cables, it will allow you to remove the motherboard and access the mSATA SSD.
Unscrew the board from its case, prise the motherboard and manipulate it by pulling out the USB connectors and audio jack.
Check and flip the motherboard over to locate the SSD. Remove the tiny mSATA SSD by unscrewing the attaching screw. The storage device will automatically spring up and so all you should do is to pull the smaller card out and upgrade it by inserting the larger SSD. Replace the screws and replace the motherboard back into its case.
You will need to go through the reverse process of opening a tablet to ensure that everything is back in its place. Once it’s done, you should then screw the tablet back in place. Boot the tablet and start installing your windows. If it has imaged the new SSD, it should boot without a problem.
Windows 8 tablet features a 64 GB SSD, which is never enough for reasonable use of the device. Therefore, upgrading the SD could be the only way to go. It is an intimidating process, but it is worth the effort. Also, it is challenging to open a tablet and putting it back without making a mistake. However, if you find a problem in either opening or putting it back, YouTube and Google search could be your best companion. But if you are not a technical person and find handling the screwdriver intimidating, consider enlisting the services of a technician.
Replacing Tablet Motherboard
When a tablet motherboard is broken/damaged, or corrupted, the device becomes useless and cannot be used to perform any task. So, the only upgrade you can give it is to replace the motherboard. But doing so is not an easy job. As we have said, most manufacturers don’t like it when the consumer tries to access the motherboard. So, you will need some wisdom and intelligence to access and replace the motherboard.
Some of the tools you may need for the job include:
- Tweezers
- Spudger
- Screwdriver
- Metal spudger set
- The new motherboard
- Procedure
Ensure to turn off the device before you start disassembling it and use the small metal spudger to separate the cover and the device.
Use the intermediate spudger to remove the cover by simply sliding the spudger around the cover and the device. You may begin sliding it at the memory card slot.
Use the tweezers to disconnect the motherboard and the battery connector. Ensure the tweezers do not touch the motherboard; otherwise, they may damage it. You may then use a spudger to help disconnect the motherboard from cable disconnectors.
Use a spudger to flip the camera connector cable and use the tweezers to remove the rear camera from your device.
Using a spudger, remove the motherboard from the case. Also try to disconnect the headset jack, LCD panel, speaker, the USB port shield, and use a screwdriver to remove the screws around the motherboard. Do not apply a lot of force because you may end up damaging other components.
Once you finish, you can replace the old motherboard with a new one. The reverse process should help you to replace every bit of items you had removed from the motherboard.